Showing posts with label Recipes. Show all posts

Sunday, October 19, 2008

Cooking with Mikey: Chicken Stock

I am slowly starting to feel better. I would have loved some homemade soup during the week while I was so sick, but unfortunately didn't have the energy to make any. The Mister pulled through with Campbell's Tomato Soup and Grilled Cheese sandwiches during my misery, which was almost as good since I didn't have to cook or clean a thing.

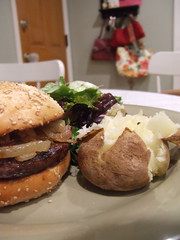
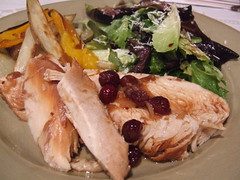
I try to roast chickens regularly. One chicken easily feeds our family of four, and more often than not provides leftovers I then toss in a big salad for the next night's dinner. I save the carcass/bones to make chicken stock, which I store in the freezer for other meals. If you've never made chicken stock, I suggest you give it a whirl. It is very simple to make and takes almost no supervision while it sits on the stove for hours. Plus, it makes the house smell yummy.

You don't have to roast your own chicken, either. You can use one of the pre-roasted chickens you can buy at store near the checkout counter if you come home too late to roast your own bird. Just be careful when selecting the flavor of a bird you will later use for stock. "Chipotle-Orange Roasted Chicken" may taste good off the bone, but it makes an odd flavored stock.

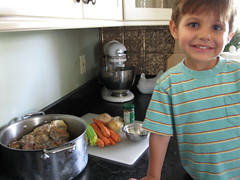
I never have the energy to make chicken stock after cooking dinner, but buy all means go for it if you are so inclined. I prefer to place the carcass is a freezer zip-bag and toss it in the big-chill until I'm ready. I had two waiting for me in the freezer today, so I decided today would be a fine day to teach Mikey how to make chicken stock.
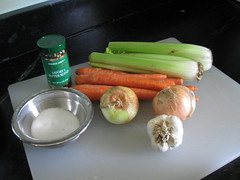
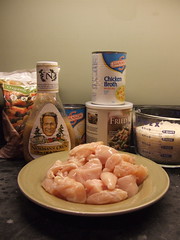
Chicken Stock

You will need:

  • Chicken, whole bird or whole bird carcass
  • Carrots, 3-6 whole
  • Celery, 3-6 with leaves
  • Onions, 1-2 whole
  • Garlic, 1 head
  • Herbs (I use thyme, parsley, and bay leaves)
  • Salt, 1-2 TB
  • Peppercorns, 1-2 tsp.
  • The biggest pot you have
  • Water to cover
Chicken Stock

I recently made soup at my parents house, and must have left my bay leaves there. Chicken stock is flexible, though, so it's not the end of the world. I also didn't have fresh parsley or thyme, so I just used the dry version I had in the pantry.

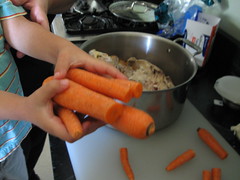
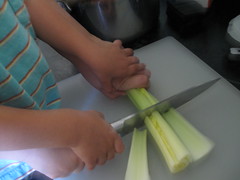
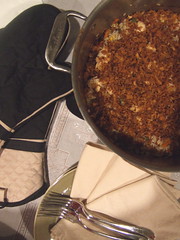
Start off by tossing all your chicken bones in a big pot. Then roughly, and I do mean roughly, cut up all your vegetables.

Chicken Stock

Chicken Stock

Seriously, in half is fine. Don't go crazy scrubbing them, and don't peel them, either. Since they are root vegetables, they can be unwieldy for small hands to chop. For me, the easiest way to allow Mikey to participate was for him to rest his hands on mine. I did let him try on his own, but it just required too much force to get through the carrot. I felt this was the safest way for both of us to have a good time. Mikey was already removing his hands from mine when the Mister took the picture of us chopping celery. He had them higher up on me (and much farther from the knife blade) when we were actually chopping.

Chicken Stock

The same technique doesn't work for the onions or garlic. Just let your little one watch while you slice through anything round and mobile. Mikey's job was to pick it all up off the counter and dump it into the pot. Don't bother removing the skin from your onions or garlic. They'll get separated out later, and the onion skin contributes to the color of the stock.

Chicken Stock

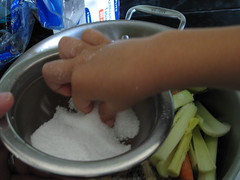
At this point you can go ahead and add your salt and pepper. Be generous with the salt. Mikey likes to pinch and sprinkle like the chefs do on T.V., but his little fingers can't pinch nearly enough to season the stock. I let him do that for a while, and then toss in a healthy tablespoon or two of salt while he is busy opening the peppercorn jar.

Chicken Stock

I fill his palm with peppercorns, which is about a couple of teaspoons, and let him toss it into the pot.

Chicken Stock

After that, I fill the pot with water to cover. I do this before I add my herbs because, for me, it makes it easier to judge if I have enough. I want the stock to look like stock from a restaurant, which is usually peppered with herbs through out. My stock pot is huge today because I have two chicken carcasses in there. I've been slow to make stock because the weather has been so warm.

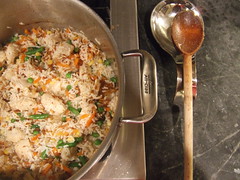
At this point you can turn on the stove to medium-low (depending on your burner) and let it simmer for four hours or so. If y ou get what looks like foam, skim it off with a ladle and toss it. Other than that, you're done. Send off any little ones who have helped you to play. The rest is boring, and transferring the hot stock to containers when it's done isn't safe for clumsy hands.

Chicken Stock Hour 1

Chicken Stock Hour 2

Chicken Stock Hour 4


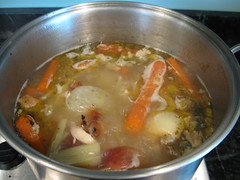
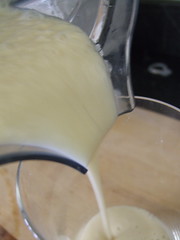
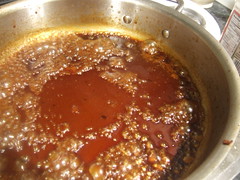
It will reduce quite a bit in the pot, and that's fine. Usually it's about an inch and hour. When it smells and looks good and rich (about 4 hours) take it off the heat and strain the stock into a new container. Because I made so much stock (12 cups!) I had to strain it into another large pot and then transfer it to canning jars. Normally, I would just strain it into a large glass bowl.

Chicken Stock

Allow it to come to room temperature on the counter, then refrigerate it overnight, and the next morning skim off all the fat and impurities on top. See how my stock looks a little murky? That's because it's right out of the pot. Tomorrow, after I skim the top, it will be nice and clear. Store the stock in freezer safe container in whatever unit of measure you prefer. I like 1-2 cups, which is about the amount I use for any recipe. The stock should keep in your freezer for about 3 months.

This week I plan on using this stock to make a family favorite around here--Chicken Tortilla Soup.


Friday, April 18, 2008

Day 2: An Unexpected Bonus

We all woke up late. I went to a party at Kara's house, so the Mister fed the boys dinner, gave them bathes, and put them to bed. He swears it was lights out by 8:00pm, so I'm thinking he slipped them Valium at bedtime. Mikey didn't wake up until 8:45, and Nicholas was in his crib stretching like a cat in the sun until 9:00am!

Since Mikey's egg allergy diagnosis, breakfasts have been a challenge. Baked goods are out of the question, as are eggs, obviously. We've been giving him cereal and fruit, but it doesn't keep him satisfied. I have also noticed he gets a bit hyper, and then crashes around 10:00am. It makes sense, really. Even the healthy cereal I give him is pretty empty in terms of nutritional content. He likes his cereal dry, no milk, so really what is he eating other than some puffed rice and fruit sugar?

This is where the green smoothies have been an unexpected bonus. Mikey loves them, and they are perfect breakfast material. Who knew? Maybe this was God stepping in, trying to give Mikey a better breakfast. Maybe it's just a coincidence. I don't really care! I'm thrilled that I now have something nutritious, filling, and [gasp] tasty for Mikey to have for breakfast.

Here's what we drank this morning.

  • 2 cups water
  • 1 frozen banana
  • 1/2 bag frozen pineapple
  • 1 TB Agave
  • 1 TB Coconut Butter
  • 2 cups spinach
Add everything to the blender and blend until smooth.

Sunday, March 9, 2008

Only the Best Smoothie Ever

Smoothie Ingredients

Sunday is a good day for recipes. I don't know how many people out there are interested in healthy kids snacks (that are tasty enough for adults!) but here is our family's favorite smoothie. In the interest of full disclosure, it's really the only smoothie I make because I love it so much. With good reason: the few times I've ventured out and tried a different fruit combination the results were less than spectacular.

Young Coconut

I already know what some of you are thinking. What in the Hell is that?!

Tools

It's a young coconut, also known as a Thai coconut. I buy mine at the store for about $1.50. You can find them for less than $1 at Asian markets, but I haven't taken the time to find one in my area. They are incredibly good for you for several reasons, but are primarily known for the electrolyte and mineral rich water inside. I first got hooked on these last summer during the dog days of August. I live in the desert, and just one smoothie a day was instrumental in keeping this not-so-good-at-drinking-water-girl hydrated. As you can see, you need some heavy artillery to open them. Nothing expensive, I think that knife cost $5 at Target, because you definitely want to avoid ruining your good knives on one of these bad boys. Stick with something cheap and relatively disposable.

Opened

I wasn't about to try and take pictures and open my coconut at the same time, so here is a good video to check out on proper technique (there are many different ways, but this is how I do it).


See how he/she puts the straw in to drink from the coconut? Not so much. Mikey hates the taste of coconut water, and so does The Mister. It has a nutty/sweet taste. I don't mind it at all--in fact, I always taste a tablespoon or so to make sure the coconut is fresh. But as far as drinking it from a straw? Meh. I'm not there, yet. I just open up the coconut and pour all the water into the blender.

OK, so the main attraction to the young coconut is the texture. As you can see from the video, it's very soft. A mature coconut, the kind we are all used to seeing, can be hard as a brick and impossible to process to a smooth texture in a smoothie.

Scoop out the Inside

You pretty much scoop out the coconut meat with a spoon and toss that into the blender with the water.

Then, you add two cups of frozen pineapple and 1 frozen banana. The banana doesn't have to be frozen, but it makes a difference in texture (it's thicker and creamier). Likewise with the pineapple. Plus, I like my smoothies ice cold.

Tall Glass of Smoothie

Blend it all until thick and smooth. That's all it takes to make the best smoothie ever.

Only the Best Smoothie

You even get to sport a cute little "Got Milk" mustache!


Tuesday, March 4, 2008

Raw Food for the Rest of Us

Over the summer I went to a raw food party. I know, I know. It sounds weird and it's probably a crunchy California thing, but I had a great time. It was the night before my endoscopy, and for the first time in months I was able to eat a meal that didn't leave me doubled over in pain. I also had a weird, buzzy energy. When I later got my endoscopy results (9 ulcers, esophagitis, and erosions in various parts of my stomach) I really felt that eating raw was the perfect compliment to my Nexium. I got all excited and started reading more about it. I even ate raw, off and on, for most of the summer. There was just one little problem. I don't have much in common with people who eat raw. Let's just say a lot of the people look like this clown.


I'll be nice and won't share his name--but he is a well known "raw foodist." He also has legions of fans, and I don't want any of them to find me and poke my eyes out with incense sticks or beat me over the head with their Birkenstocks. This guy doesn't use soap, shampoo or deodorant because he believes they are rife with toxic chemicals. He also wears medical I.D. tags stating he does not want any pharmaceuticals or IV medications because, again, they are toxic. Are you getting an idea of the people drawn to raw foods? My point exactly.

So, imagine my surprise when I opened Domino magazine today and saw this article on raw foods! The nutritional expert featured, Zoe Sakouitis of Blueprint Cleanse, looked [gasp] normal. A wee bit thin, but I'm a jealous harpy so my judgment may be clouded. It was a tiny blurb of an article, but she bathes, uses things like soap and toothpaste, and--wait for it--even eats cooked food every now and then! Her take on raw foods? Eat raw during the day and don't stress about the burger you had for dinner with friends. Now, that's a philosophy I can stand behind! Healthy eating (and the people who espouse it) can be, dare I say, balanced, normal, and hip. Who knew?

This article really came at a weird time, because since Sunday I've pretty much eaten only raw foods. There's no real commitment on my part to continue, but for now it feels fine. I think the warm weather we had last week got me craving salads and fruit. I told The Mister that I wanted to eat raw until Friday and hopefully flush out all the crap I've been eating since November. After Friday? Who knows. I'll just play it by ear and see how I feel, but I do like how Ms. Sakouitis' does things.

One thing about raw: the desserts are amazing. Every night this week I have inhaled raw cheesecake. There's no dairy (it's made with nuts) but you would never know. It's crazy, and you really have to taste it to believe it. Mikey and I also made some raw fudge today and Oh. My. God. it is so good. It doesn't taste like fudge, though. (I actually hate fudge, so that's a good thing.) It's just chocolate-y chewy yumminess. I love how every now and then you get a taste of salt. The Mister tried some when he got home from work and said, "These are going to be trouble." They are. I've already had 6 or 7 pieces. Here is the recipe, which comes from Raw Food Real World.


Chewy Chocolate Freezer Fudge

2 cups, or 1 16oz jar Raw Almond Butter
1/2 cup + 2 TBS Maple syrup
1/4 raw carob powder
1 TBS (heaping) raw coconut butter
1 tsp salt (I used kosher)
2 tsp vanilla extract


Put everything into your mixer and turn it on. Wait until it comes together.

That's it! I'm not kidding! At this point, it's like super rich, stiff frosting. Mikey couldn't resist licking the spoon.


Then you just put it into a saran wrap lined 8x8 dish, smooth it out, and cover the top with more saran wrap. Kinda like your wrapping a present made of chocolate. Toss that puppy into the freezer.


After an hour, take it out of the freezer and remove it from the dish, unwrap it, and set it on a cutting board. Cut it into 1 inch squares and put back into the freezer in a freezer bag or tupperware--whatever, just put it in something freezer safe. You'll want to store these in the freezer, otherwise the almond butter will just melt at room temperature.

Now you have an easy, healthy, and delicious sweet treat waiting for you!

Tuesday, February 19, 2008

A Birthday Cake

Snickerdoodle Cake

Sorry for the delay in sharing with you the recipe for Nicholas' birthday cake. The lawyer in me had trouble posting a copy-righted recipe on the internet. I did some searching and I found some recipes posted online that are, essentially, uncredited versions of the same cake I baked from this book so I feel better about the whole thing. Be forewarned: this recipe uses a cake mix. I love to bake and cook from scratch, but scratch cakes are usually drier and denser than a mix. They are also usually not as sweet. I happen to love the taste and texture, but most people prefer the sweet and soft crumb of a boxed cake. The Cake Mix Doctor helps me strike an easy compromise. The recipes are ridiculously easy, too, so if you are a novice baker you are practically guaranteed success. This cake was a bit sweet for my taste, but absolutely no one else agreed with me-- so there you go. OK, enough talk. Here's the recipe for Snickerdoodle cake and Cinnamon Buttercream frosting I found online.

CAKE

1 Box Plain White Cake Mix
1 cup Whole Milk
8 TBS butter, melted
3 Large eggs
2 Tsp. vanilla
2.5 Tsp. cinnamon

Preheat oven to 350 degrees. Grease and flour two 9 inch pans. Place all ingredients in bowl and mix on low for one minute, scraping down the sides as necessary. Increase mixer speed to medium and mix for 2 more minutes, again scraping down sides as necessary.

Divide batter into prepared pans, smooth down top with spatula, and place both pans side-by-side in the oven. Bake for 27-29 minutes, or until golden in color and the cake springs back when you lightly press it with your finger. Remove from pans after an initial cooling period of 10 minutes or so. Then take out of pans and allow to completely cool on racks, about 30 minutes. In the meantime, prepare the frosting.


CINNAMON BUTTERCREAM FROSTING

8 TBS butter, room temperature
3.75 cups Confectioner's Sugar
3 TBS milk
1.5 Tsp vanilla extract
1.5 Tsp cinnamon

Place softened butter in mixer and mix until light and fluffy, about 30 seconds. Add Confectioner's Sugar, milk, vanilla and cinnamon. Blend on low until sugar is incorporated. Increase speed to medium and mix until frosting is light and fluffy.

Frost your now cool cake layers as usual.

After the cake is frosted, place it in the fridge for 30 minutes so the frosting can stiffen up. After that, you can slice, eat, and store in the fridge for a week.

Enjoy!

Thursday, January 24, 2008

Dinner Challenge: Chicken & Rice Casserole Thingy with Frenchs Fried Onions

Dinner really doesn't get much easier than this recipe. This one comes from my mother-in-law (hi, Pam!) and she swears she got it off the back of a Durkee's can of fried onions. I've whipped Google into a sweat over the last few years trying to get an official recipe, but to no avail. Why an official recipe? Because my mother-in-law gave her copy away years ago and I would like to see if the original had any secret ingredients we might be missing out on. If she did get it off the back of a can I doubt we're missing anything more exciting than pepper, so I'm not going to stress about giving an incomplete recipe. If you happen to have the original recipe, please let me know if I'm missing anything!

6 Ingredients

Chicken & Rice Casserole Thingy with Frenchs Fried Onions

4 Chicken breasts
3 cups Chicken stock
3 cups Instant rice, dry
1/4 cup Italian salad dressing
1 pkg. Frozen, mixed vegetables (broccoli, carrots, water chestnuts works well)
1 can Fried Onions

Preheat oven to 375.

In a dutch oven or large, oven proof pot with lid add salad dressing and turn burner to medium. Slice chicken breast into large, bite-sized pieces and add to the pot.

Brown chicken in salad dressing until barely pink inside. Add entire bag of frozen vegetables and allow to steam in pot for a couple of minutes while you to measure out the stock and rice.

Add chicken stock to pot with chicken and vegetables. Stir briefly to coat, and then add rice. Turn off stove and cover with lid. Let sit for five minutes. Take off lid and stir into chicken and rice mixture 1/3 of the can of onions. Oh yeah. Don't worry if there is still broth in the pot. It will steam off in the oven.

Almost Done

Without removing lid, place covered pot in oven and let cook for 20 minutes. After 20 minutes, start checking your vegetables. When they are done to your liking, pull the pot from the oven, remove lid, and sprinkle the remaining can of onions on top of rice. Put back in the oven, without the lid, and allow to onions until the are golden brown and crispy, about 5 minutes.

Chicken & Rice Casserole w/ Onion Crisps

Tuesday, January 22, 2008

Orange Glazed Hamburgers with Caramelized Onions

Carrie's challenge is up and running, and she's even created a flickr group to keep track of all the great recipes!

I don't have much of a recipe tonight. It's just me using up more of my oranges. I used regular frozen hamburger patties and just cooked up a quick glaze to give the burgers a bit more flavor. I'm warning you now: I could never write my own cookbook because I tend to just add things willy-nilly. Take my measurements as approximations.

Orange Glazed Hamburgers with Caramelized Onions

For the burgers
6 Hamburger patties, frozen (or homemade!)
Hamburger buns, homemade (or store bought!)
2 onions
Cheddar cheese
Condiments, to taste

For the glaze
5 oranges, juiced (approximately 1.5 cups)
1/4 Soy Sauce
2 TB Balsamic or Apple Cider Vinegar
1 TB Ketchup

1. Slice onions in half moons and caramelized in pan with 2 or so TB of olive oil. Set aside on a plate when done.

2. In the same pan you caramelized the onions, and without cleaning it, toss in all the ingredients for the glaze and reduce by half. It's done when it is syrupy and can coat the back of a spoon. Transfer to a bowl.

Orange Glaze

3. Place burgers on the grill and baste with the glaze. When burgers are done, discard the remaining sauce.

4. With the burgers still on the grill, add the cheddar cheese and toss on burger buns if you like them toasted.

5. Take burgers and buns off the grill and add condiments to taste.

I have to say, I don't like burgers but really enjoyed these. I served it with a light green salad and a baked potato. Super easy, and a great way to use up my oranges!

Orange Glazed Hamburger w/ Caramelized Onions

Friday, January 18, 2008

Turkey Breast with Cranberry and Orange

The Crockpot recipe turned out well. The Mister loved it, which means nothing because he will happily eat anything he didn't have to prepare. Like salt, gratitude brings out the flavor in anything.

The recipe is for Easy and Delicious Turkey from the ubiquitous Fix-it-and-Forget-it cook book. I changed the name so you could have at least some idea of the flavors involved. If you read yesterday's post, you know to expect oranges. I normally try to cook from scratch, or at least use whole, unprocessed ingredients. I don't like boxes, mixes, or packets for two reasons. First, they are full of crap and don't have one redeeming health quality. Second, they are often relatively expensive and can be easily duplicated with natural ingredients you already have in you pantry, saving you both money and time spent at the oncologist's office. That said, this recipe is full of cans and packets, but think I can duplicate the recipe and avoid some of the worst offenders (I'm talking to you, high fructose corn syrup). For now, though, I thought you might like to take a stab at the original. Ready? Here we go:

Turkey with Orange-Cranberry Sauce

Turkey Breast with Cranberry and Orange

1 fresh Turkey Breast, with bones
1 can Whole Cranberry Sauce
1 packet Dry Onion Soup mix
1 cup Orange Juice

Place washed turkey breast skin side up in Crockpot. Mix the rest of the ingredients in a small bowl and pour over turkey breast. Set Crockpot on low and cook for 6-8 hours. When done, remove turkey (with tongs so it doesn't fall apart) and place on cutting board. It should easily pull away from the bones. Slice into 1 inch slices.

You can then do as I did and dip the slices into the orange-cranberry au jus, plate, and then spoon cranberries on top. You can also plate the dry turkey and pour about a ladle's worth of the sauce on top. The choice is yours, but I prefer the former method to keep the au jus from running all over the place.

This recipe is ridiculously simple and perfect for those days when you don't want to cook. I threw this all together while Mikey ate lunch in about 5 or so minutes. Prepping the turkey took the longest, but those of you who like to play fast and loose with salmonella can always skip that part.

To accompany the turkey I roasted three potatoes (sliced into wedges), one quartered onion, and one yellow bell pepper (also sliced into wedges) with olive oil at 400 for about 30 minutes. I also tossed baby greens with olive oil, a squeeze of lime juice, salt, seasonings, and a sprinkle of freshly grated pecorino romano cheese (parmesean works fine, too).

That's it! I hope you like it. Start to finish, I spent 15 minutes of actual prep time. I couldn't have picked up take out any faster, so this has inspired me to look to my Crockpot more often.

I'll be trying out a fistful of orange recipes. If you like, I'll post the ones that turn out well.

¡Buen provecho!

Thursday, January 17, 2008

Orange You Glad Spring is Coming?

January heralds orange season in southern California. I have three productive trees and, while I look forward to all the fresh, citrus-y goodness, it can be overwhelming when you have a harvest like mine.

Orange season.

Over the weekend I baked three orange cakes, each one requiring over 1 cup of fresh squeezed orange juice. I just finished putting in the crock-pot some sort of turkey-cranberry-orange concoction that I will post about later in the week if it turns out well. I've made chocolate covered orange wedges and fresh squeezed juice. I've stuffed them in chickens and roasted them with root vegetables. On the weekends The Mister and I squeeze one over Tequila on the rocks. I think this weekend I will take some of the oranges and make a marinade of sorts with the limes coming in off our tree. The Mister will probably take a few and make homemade Margarita mix, too.

So, I've baked, simmered, dipped, squeezed, stuffed, and, of course, eaten oranges for the last two weeks. Here is what's left of my supply.

Oranges

I know. I haven't even made a dent, and from what I hear there are people in the Midwest who would kill for my supply. Grass-is-always-greener anecdotes aside, do any of you have some recipes that require lots and lots of oranges? We're good cooks and adventurous eaters, so fire away!

Thursday, January 3, 2008

Breakfast of Champions

One of my New Year’s resolutions is to recapture my health, and I am pleased to say I have taken this commitment to heart. I am three days into my 11th, 12th, and 13th resolutions. I’ve abstained from sugar and processed, refined food, haven’t had to take any of my prescription stomach medications or antacids, and haven’t had one sip of diet coke. I’ve even had breakfast, which I am sure you are not surprised to hear I usually skip. I hate breakfast. Not the concept, per se, but the traditional food offerings. Eggs are revolting. Danishes and other pastries are equally disgusting. Don’t even get me started on cereal. And you know what? I don’t even like pancakes! You can see why it is pretty easy for me to grab a diet coke and go.

But, I’m trying to be better and set a good example for the boys. To that end, and since I don’t see me liking breakfast foods anytime soon, I decided to rework the idea of breakfast. Those of you out there who are diehard breakfast fans (Hi, The Mister!) will not appreciate the following recipe, but maybe it will make a tasty, light lunch or mid afternoon snack.

Let’s make a little Tomato Crostini, shall we?

The ingredients are simple and healthy, and the recipe (if you want to call it that) is perfect for those of you with little time on your hands.

*I apologize for the poor picture quality. There is a film on my lens I haven't been able to remove. It would help if I knew what it was and how it got there!

Really good breakfast


  • 2 Slices whole grain bread
  • 1-2 Fresh tomatoes, more or less depending on size. I used a mix of grape and small in low acid varieties for my stomach
  • Pecorino Romano (Like parmesean, but made from sheep's milk. Again, this is for my stomach. Parmesean works just fine.)
  • Sea salt
  • Olive oil

Preheat your oven to 375 degrees if you're in and out of the kitchen (like I am) or 400-425 degrees if you're short on time and can catch the bread before it burns.

Start off with a good, dense bread. Take two slices and place it on a lined cookie sheet. You need a sturdy bread that can support the water content of the tomatoes once they release their juices. Sourdough works well here, but I can’t eat yeast or gluten breads without feeling like my esophagus is engulfed in flames. Instead, I stick with whole grain, yeast and gluten free breads like Whole Grain Spelt or Spelt White by Pacific Bakery.

Drizzle the bread with olive oil. If you like a crispier bread, place it in the oven while you slice the tomatoes.

Slice the tomatoes thinly, about 1/4" and remove bread from the oven if you decided to pret-toast. Arrange tomato slices on top of the bread. Spread them out and try not to pile them too much into the center. It looks prettier piled, but it's easier to eat when evenly distributed.

Drizzle the tomatoes and bread with more olive oil.

Grate cheese on top and sprinkle with sea salt.

Place in the preheated oven and bake until the tomatoes are very soft (they'll wrinkle a bit) and the cheese is melted. This should take anywhere from 10-20 minutes at 375 degrees (which is why I use this temperature--I can go back to my room and get ready) or 5-10 minutes at 425 degrees.

Take out of the oven, cut into triangles, and enjoy!

I know it seems rather silly to be so excited about my progess since, oh, Sunday. Perhaps I should have held off on this post until I had a more respectable number of days under my belt. I don't think so, and here is why. I believe part of the reason resolutions fall by the wayside is that we expect perfection and don't often take the time to ackowledge and applaud even the small steps we take towards achieving our goals. The journey is just as important as the destination. Because of this, I think I’m going to another resolution to my list:

21. Celebrate the small successes.

YUM!